Post by wayne on Dec 20, 2015 1:50:45 GMT -5
This thread is quite long so make sure you scroll all the way through.
The first section covers the basics of dismantling and refinishing the "cans".
The next section covers two alternate means of replacing the instrument "glass": GOANDY's curved plastic screen followed by information on a flat glass alternative.
Ultimately, this thread will include details on refurbishing or at least servicing the gauges themselves.
DISMANTLING:
Once removed from the bike, turn the can upside down. There are two large screws holding the gauges and top half to the bottom half of the can. Undo these and with a bit of a wiggle, the whole top half of the can and the gauge set can be lifted out of the lower can which retains the flip hood.
Looking at the bottom half with the flip hood, you'll see it's really obvious how it all comes apart.
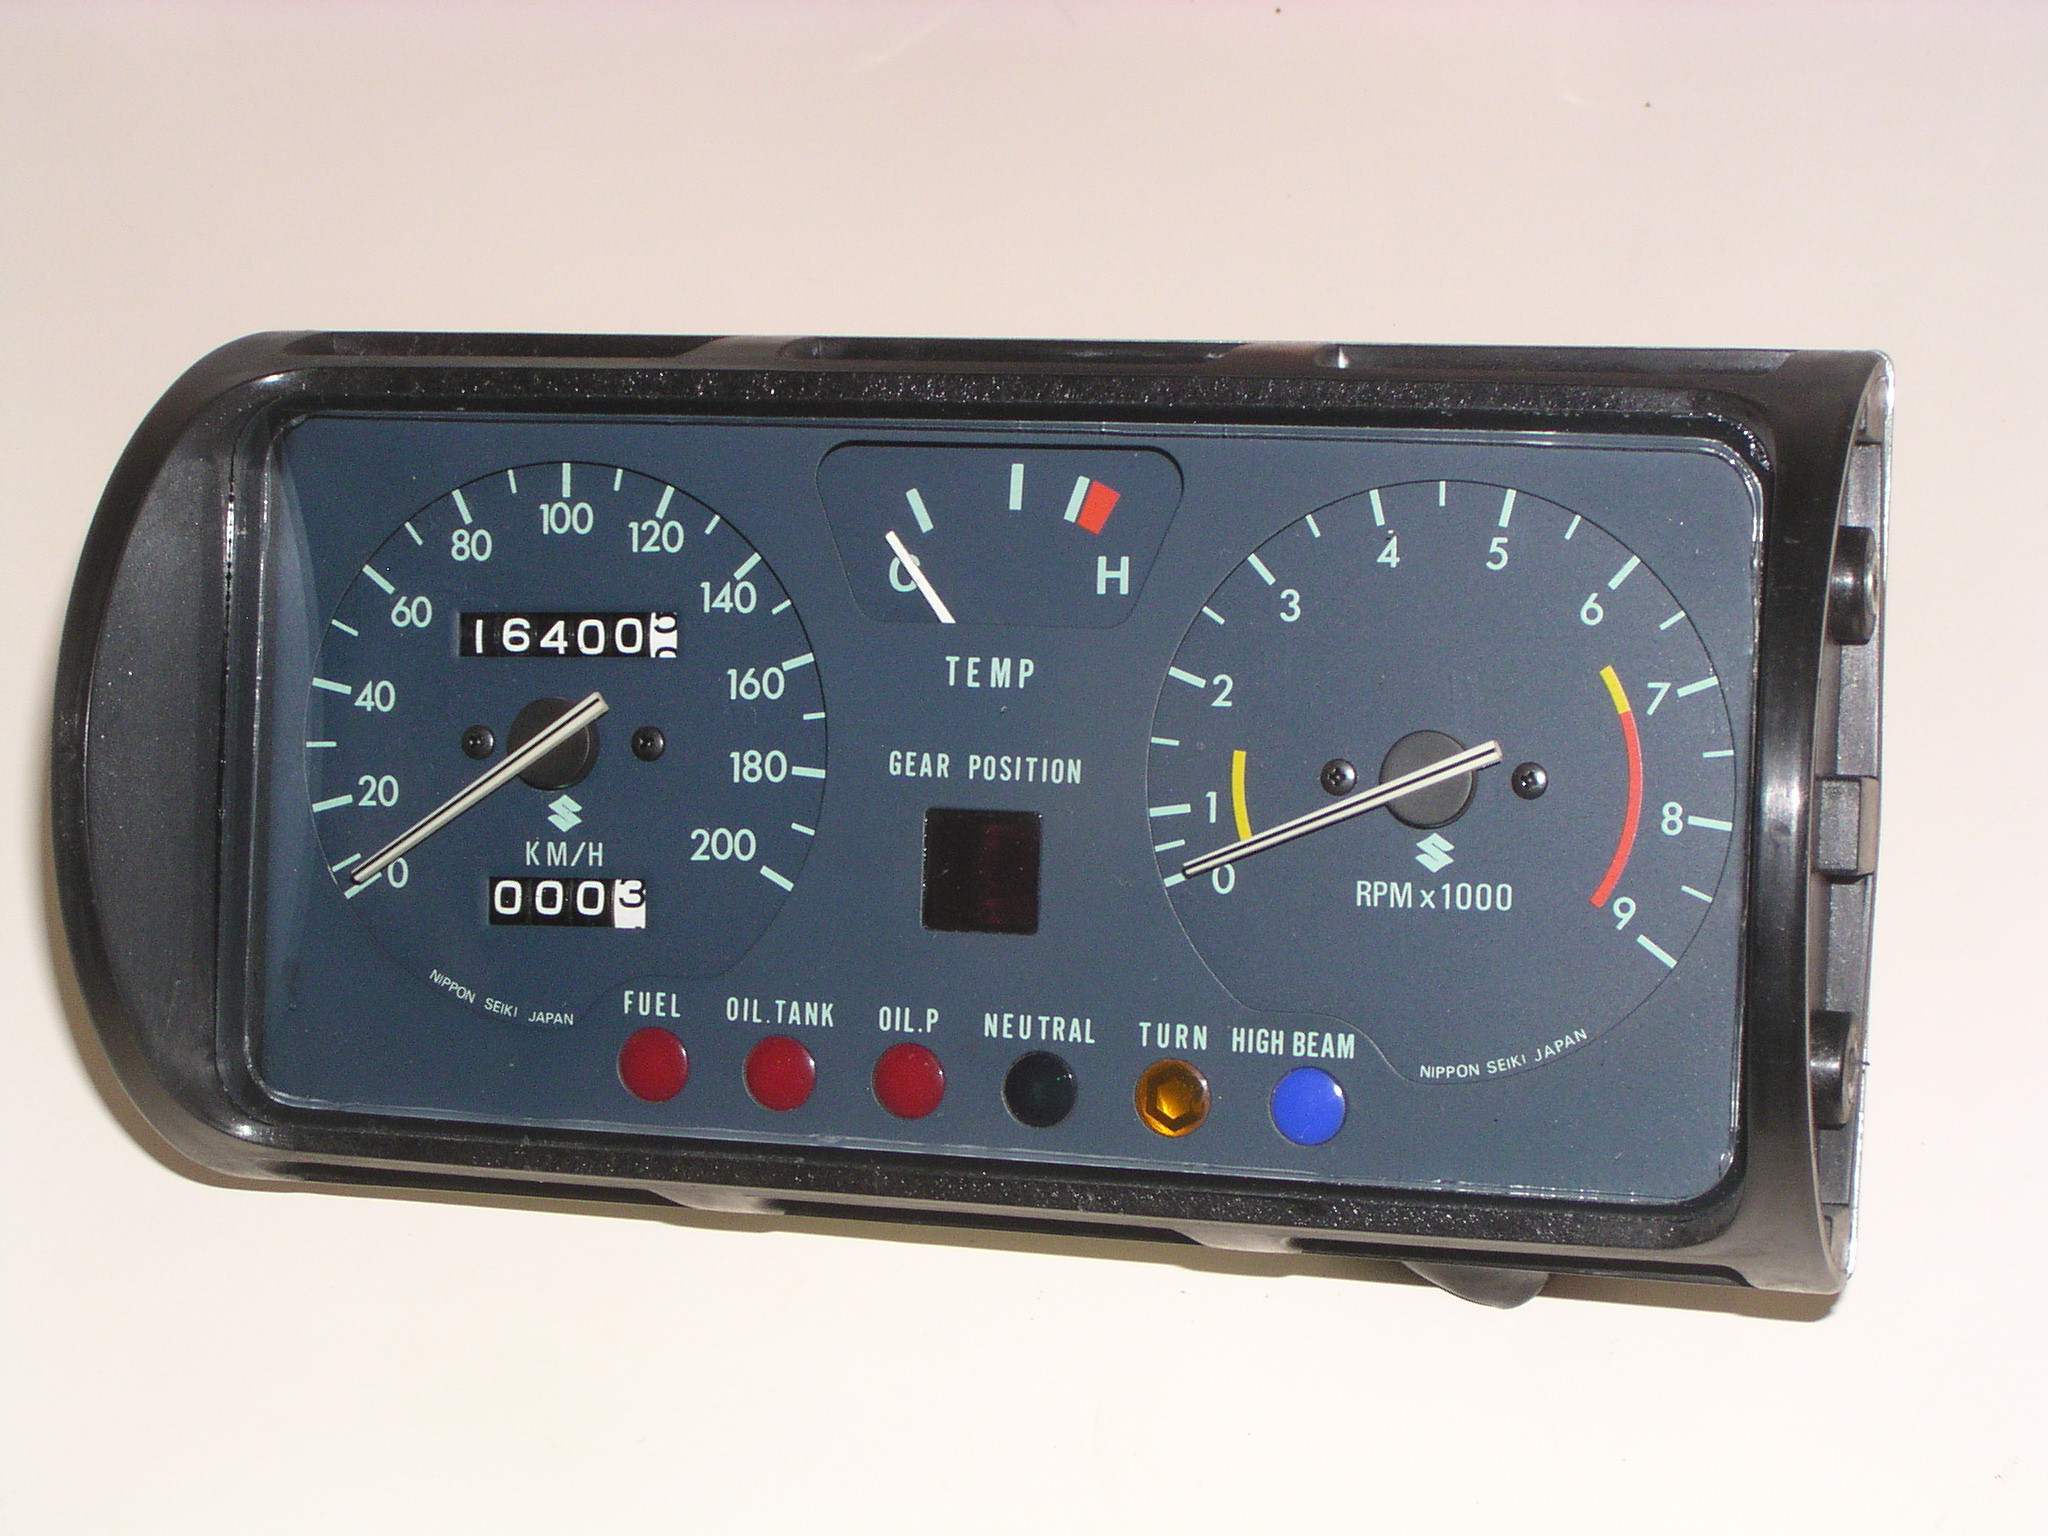
Meanwhile, re the top half, there are four countersunk screws on the side of the top can which hold the top half to the gauges. Undo those and the top half of the can will separate from the gauges themselves.
You'll also see now that there's 10 small screws that hold the plastic lens to the top half of the gauges if you need to get at them.
Just a warning, I'm told that instruments in general should never be stored upside down as the damping gel for the needles can leak out (probably already dried up and disappeared anyway).
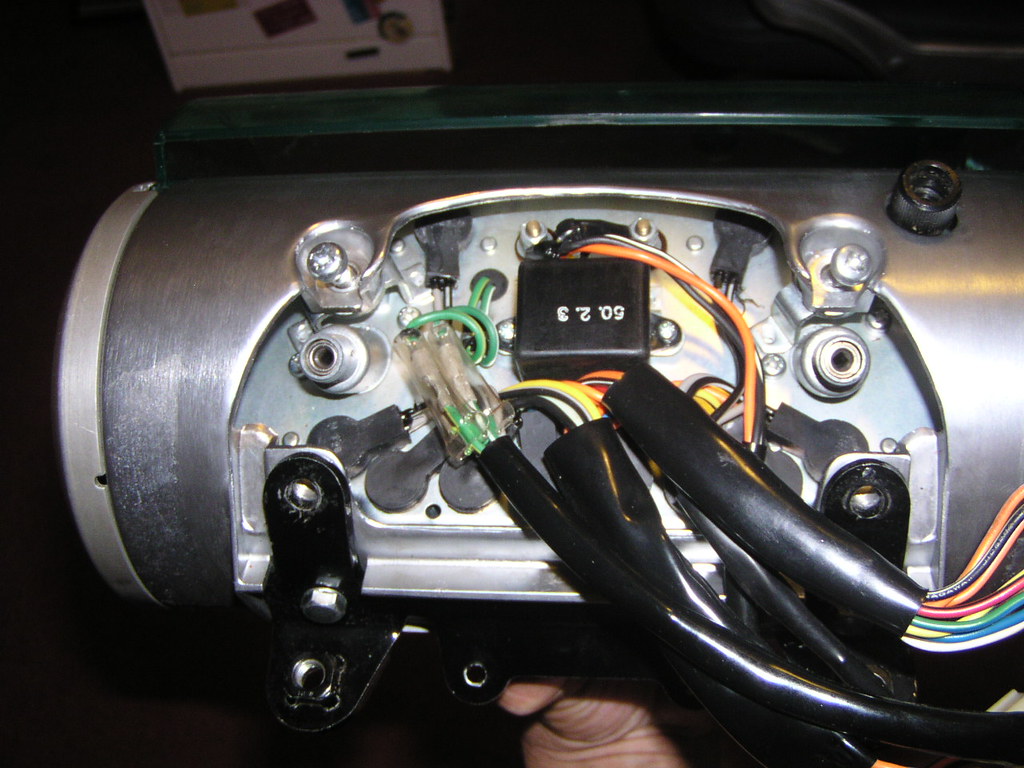
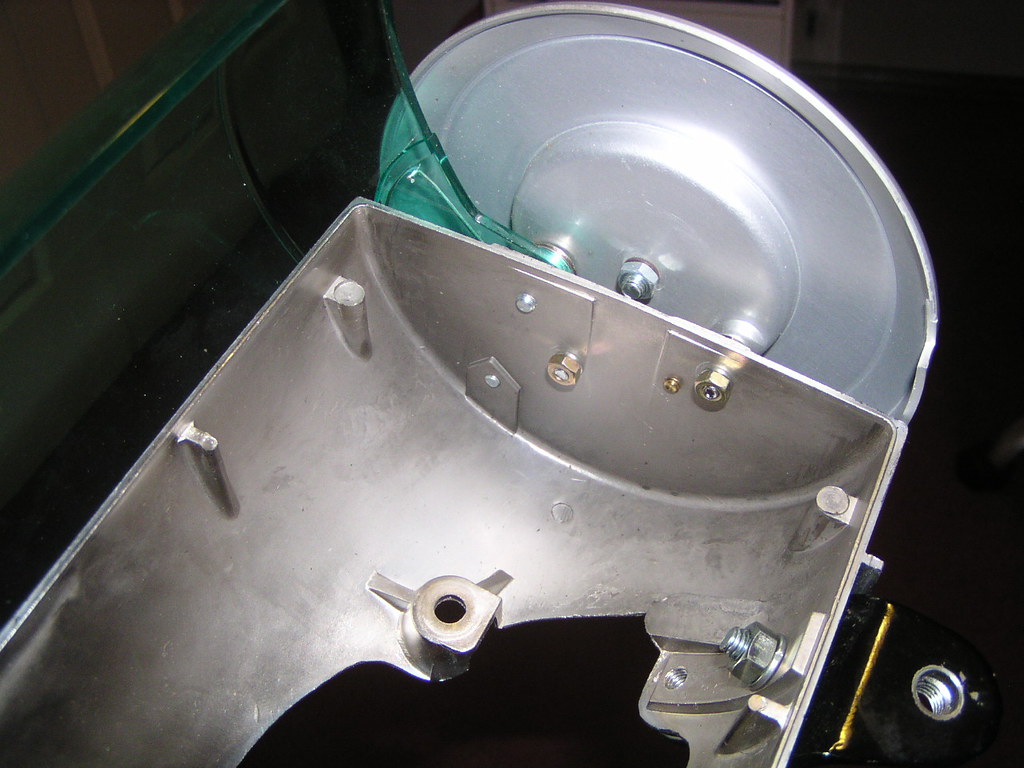
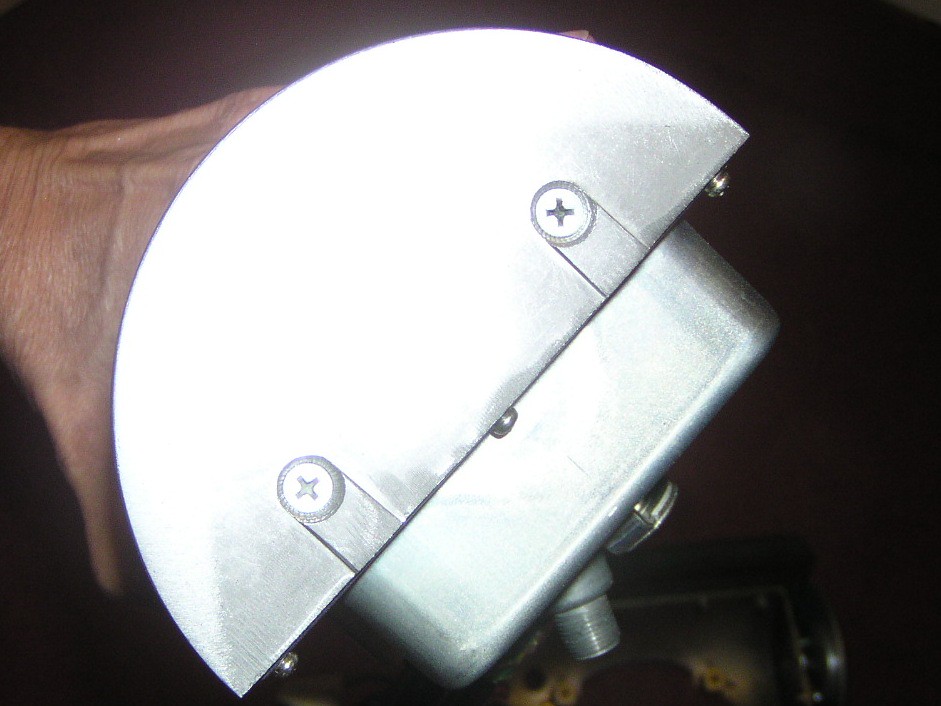
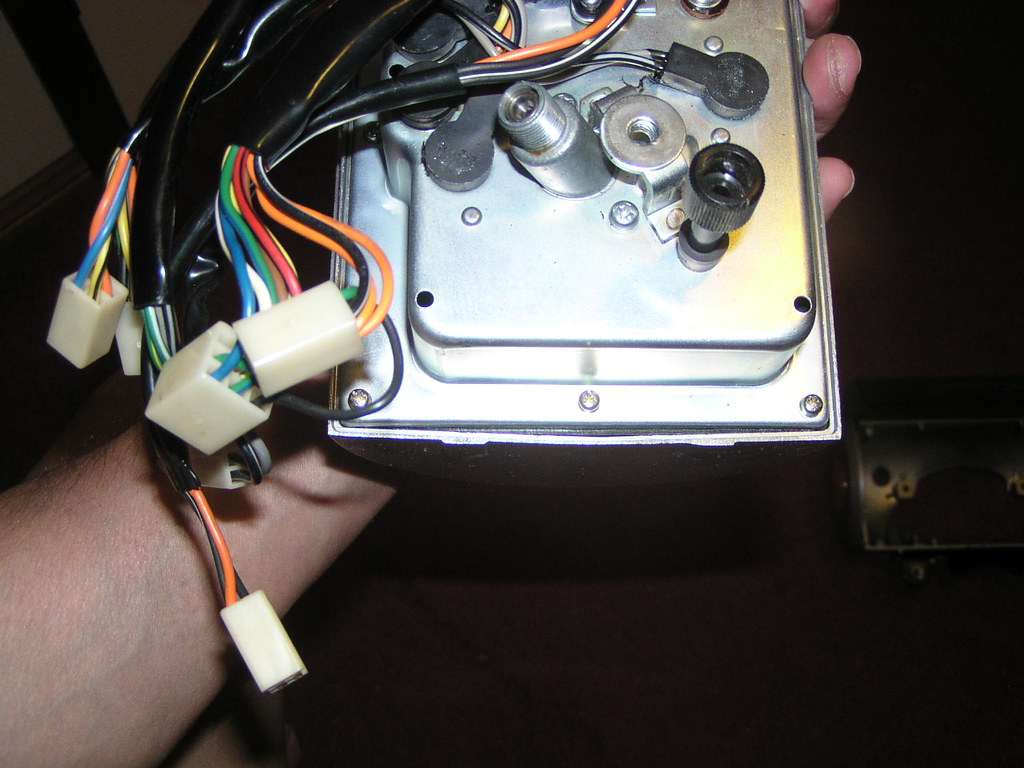
ORIGINAL FINISH:- what was it ?
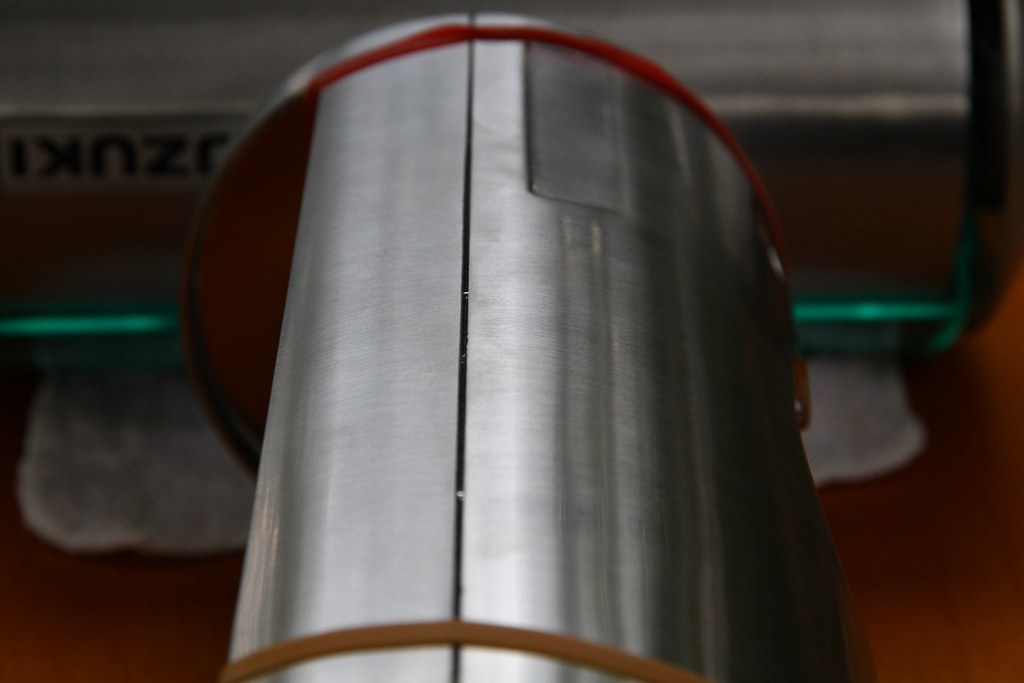
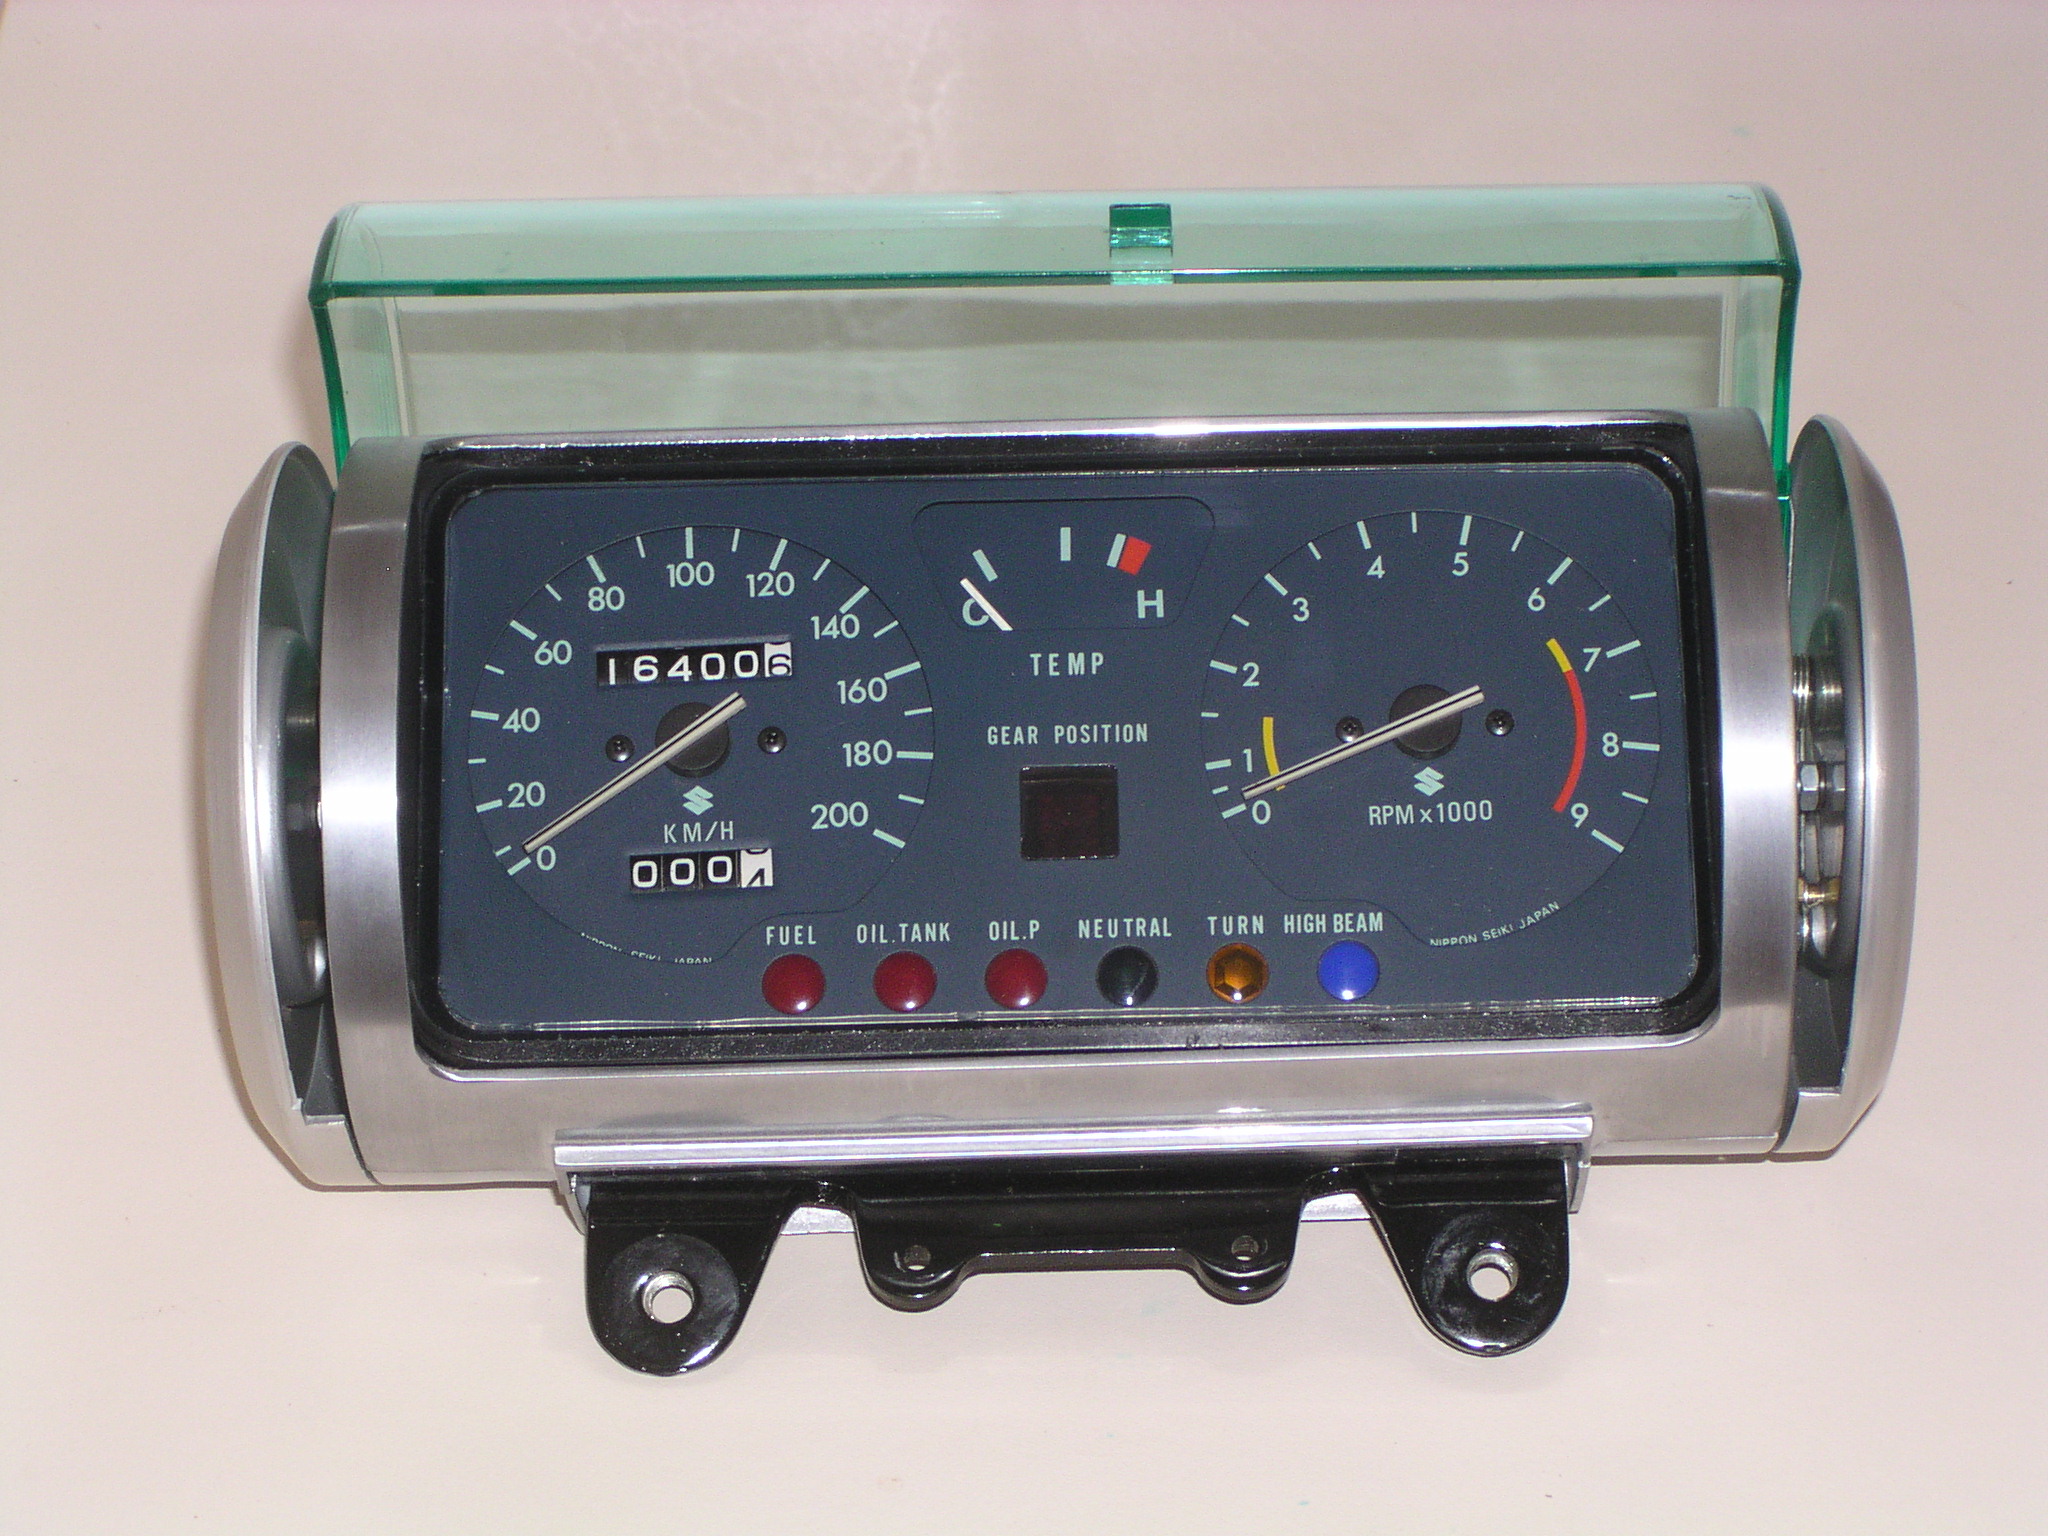
The cans were not painted. They were brushed satin chrome. Most chrome platers can do this. See below for the plating:
THIS IS NOS (ie a brand new original):

THIS IS AN OLD SET OF CANS REPLATED WITH BRUSHED SATIN CHROME:
THE END CAPS
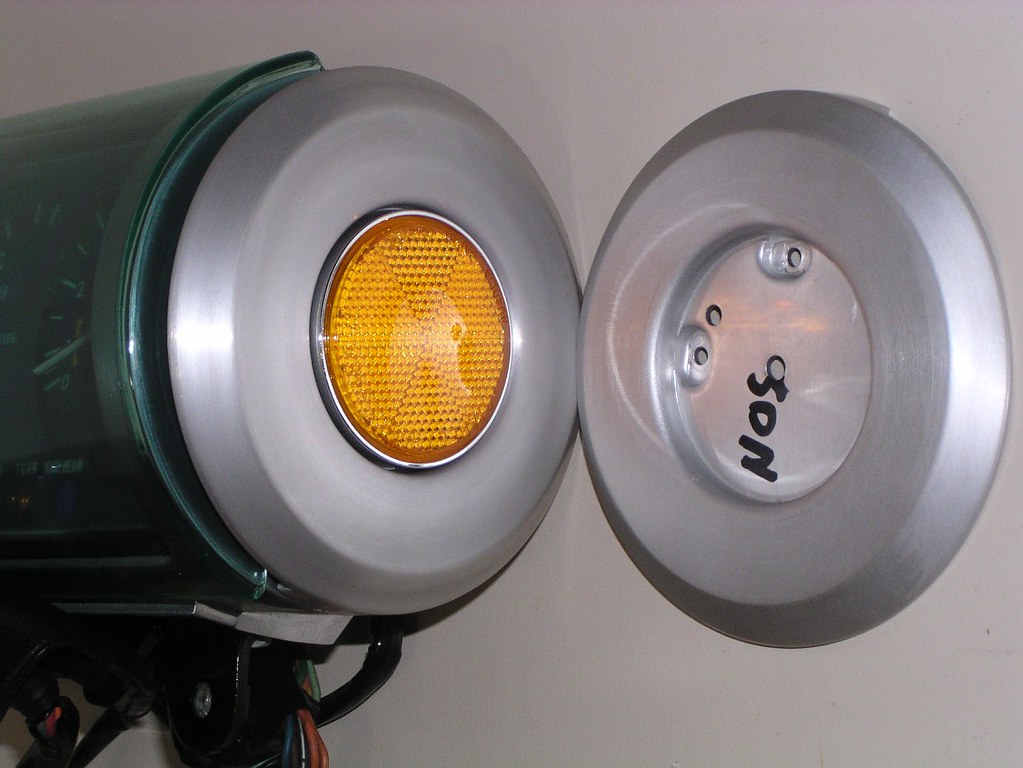
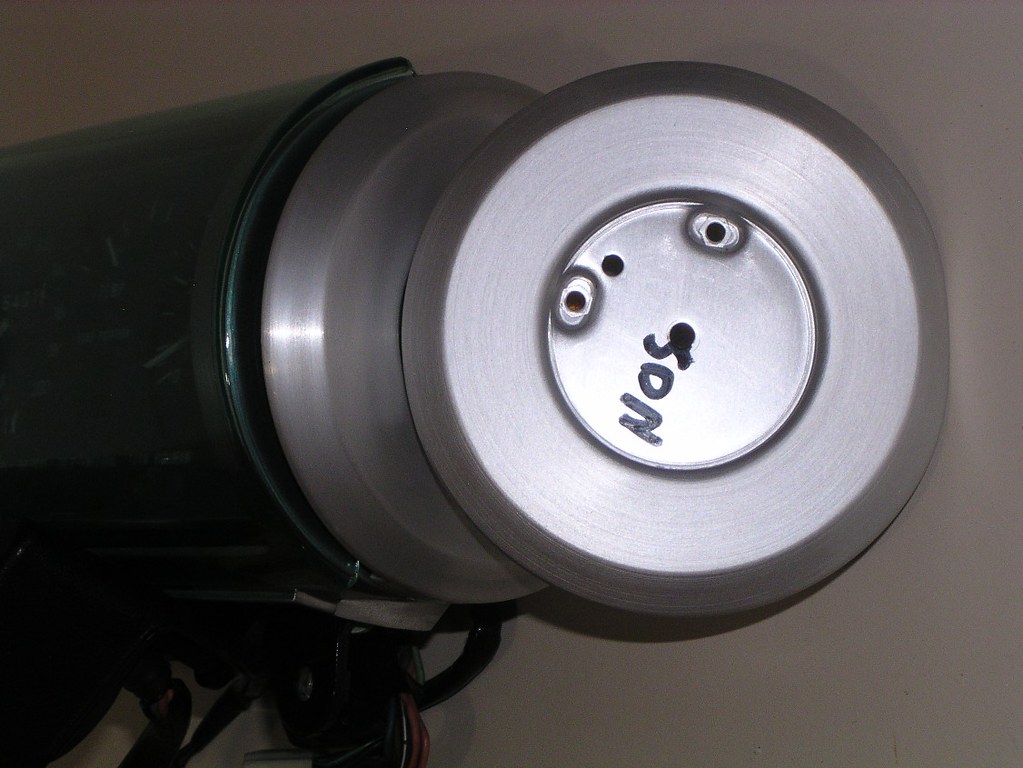
These are anodized and it was a simple case of supplying them to an anodizer along with an original sample. The job I got back was perfect. Here's a photo of a restored end cap and an NOS cap:
The CLEAR LENS
The original plastic lenses invariably craze. Suzuki had considered using glass but decided against it as design rules in some countries prohibited its use due to safety concerns. The original lens is slightly curved and before you ask, no, nobody has an NOS one. They do not exist, anywhere. The clear lens is unfortunately bonded to the black plastic surround in such a way that it cannot be simply removed. The best results have been achieved by milling out the old clear plastic.
It's possible to replace the lens with flat glass but the depth of the milling rebate has to be carefully judged as the clearance between the instrument needles and the surface of the glass is minimal. It is also essential to ensure that the new bond between glass and surround is waterproof.
It's also possible to make a curved replacement (clearance issues solved !). The following cut and paste from Goandy has had some minor pictures removed. This do not effect the post in any practical way. The original is here: re5rotary.proboards.com/thread/1385/new-curved-instrument-screen
MAKING and FITTING a CURVED CLEAR PLASTIC INSTRUMENT "GLASS" by GOANDY:
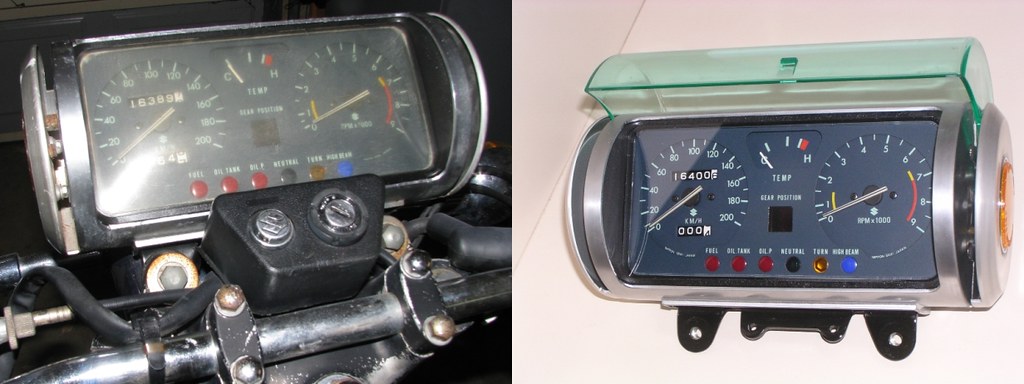
Job now finished. I've put a couple of photos on this first post to show what is possible- this is the ideal solution if your screen/lens is crazed or cracked.
Before:

Back on bike:

Here's how I did it.
I want to replace the instrument screens in both my M models as the plastic has crazed and gone yellow. The problem is that is has a compound curve on it, which is what I want to replicate instead of just chucking a bit of flat glass or plexiglass in it.
What I'm doing is taking a mold of both sides of one of my screens and then I'll heat some acrylic sheet and form it between the molds. Yes, I know acrylic will scratch but it will also polish out as well.
I tried making molds out of car filler (epoxy "bog" or "bondo" to the statesiders) but the surface isn't smooth enough- the heated and pressed acrylic shows up any surface blemishes.
Next up I polished the outside of the screen and used a mix of plaster of paris and cement- gives a lovely smooth, shiny surface. I've only done it today so I'll give the molds a few days to cure and then try making a screen.
The inside mold was particularly difficult to extract but nothing a bit of perseverance didn't fix!
**EDIT** Don't use any form of reinforcing in the mold as it will crack around them! Also, for the inside mold (male), whilst it's setting, carefully scrape the plaster away from the sides of the housing- it'll make it much easier to remove when set.
Here's some photos of the progress so far:


Getting pretty close now. A few inclusions on one face for this molding but with better dust control (the acrylic is super static and attracts dust like nothing else!) it should get better. At the end of the day I can also polish any slight imperfections out.
What I do is heat the acrylic sheet in the oven (DON'T TELL THE WIFE!!) for 5-10 mins at 210 celcius, but checking regularly. As soon as it's floppy, I take it out, drop it onto the female mold, line the male mold up on top and clamp them together. a few minutes later it's done. The shape is excellent so once I've got them without any surface imperfections I can start milling out the aperture in the original lens housings, cut these new screen to shape and glue them in! Exciting!
Bit more progress- managed to sneak in a couple of minutes on my friend's mill and then a couple more back at home (supposed to be finishing a few jobs on the house that are 4 years old...)
Milling the old screens out wasn't too bad, but hard to get a nice round corner- close enough though. I couldn't get up to the edge on either end of the screen due to the milling bit not being quite long enough so obviously this screen will lose a few points at the concours! Same for finishing the new screen to fit- all done by eye. I'll fix the screen with epoxy then after it's all set will mask it off and paint the housing in satin black to make it look pretty.
Oh and before anyone asks, no, I won't be doing this for anyone else! It probably takes around 5-6 hours to do one screen spread over a few days plus all the stuffing around trying to get half decent molds made.... I'd suggest you see what Jess has in stock ;D


Screen has a bit of a bow in it but that will be straightened when glued in place...

Little bit of an improvement!

Just to tidy the screen up and hide the glue when I do it, I've put a black border on the inside of the screen. I used a proper paint pen, not a black marker!

Makes a really neat line.

Nearly....

Well here we go. All done and I'm very happy with the result. Not perfect but so much better than before!


All done and back on bike. Looks really good. Unfortunately it makes the rest of it look VERY shabby!


PREPARING and FITTING a FLAT GLASS REPLACEMENT SCREEN:
The first step is to machine out the original plastic. There is practically no other way to do this than by using a mill. I've had three different shops attempt this job and the first was disappointing as it left very visible cutting marks all around the plastic. This was dealt with in the final fitout by gluing a black plastic surround, like a thin picture frame, on top of the glass to hide the poor machining.
GoAndy's solution is more elegant by using a painted black "frame" on the inside of the glass.
My second attempt had the frame milled at one workshop and then I supplied that frame to a run-of-the-mill glass shop who did an impressive job of cutting the glass to a precise fit.
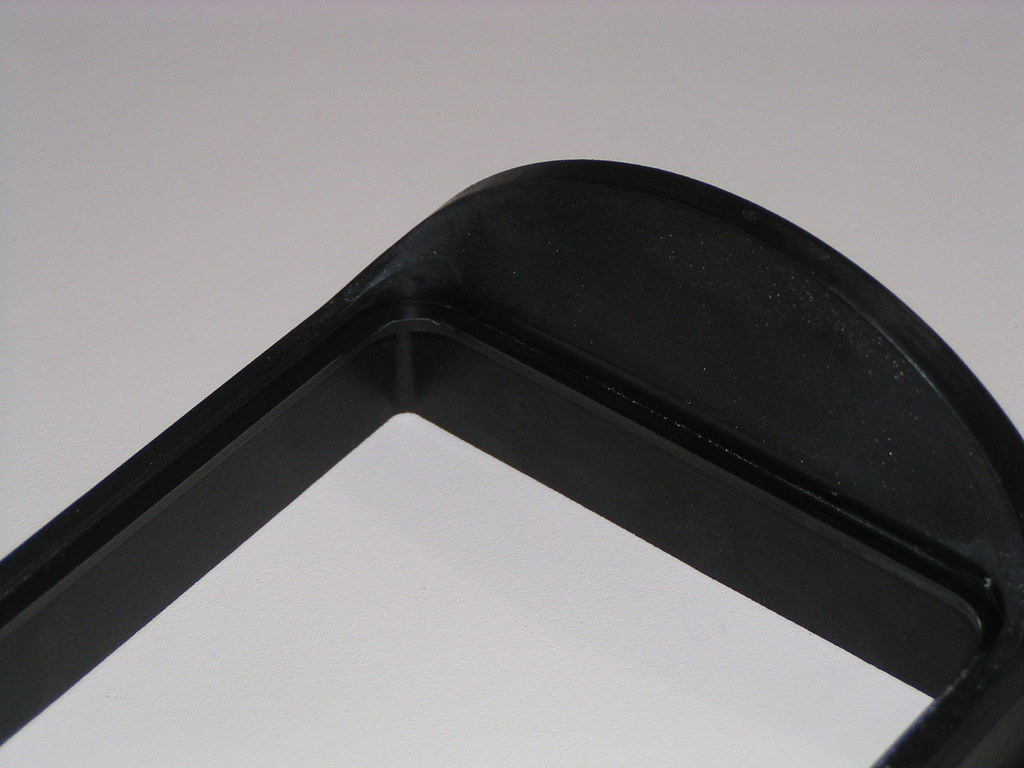
If you're lucky enough to get both a top notch man on the mill and a precise glass cutter, then no garnish frame will be required. My third attempt had the milling and glass supply done by someone on this site who shall remain nameless lest he gets flooded by requests. It's a beautiful milling job he did for me. It's clear from this and Goandy's above that the milling can be done neatly:
That second attempt was with 4 mm glass, the thinnest the shop at the time could cut to size. Despite the precision fit, there simply was not enough clearance between the instrument needles and the inner surface of the glass to allow proper function. I tried raising the black surround holding the glass with thin frames between it and the instruments themselves. By the time you'd packed it high enough, the instruments no longer properly fitted in the cans.
Glass of a maximum 3mm and a rebate in the black surround to match will work. If you can get even thinner glass and less rebate, take that option. With 3mm, make sure the rebate is no deeper, not even a point. You'll lose needle clearance and be back where you started minus a workable surround.

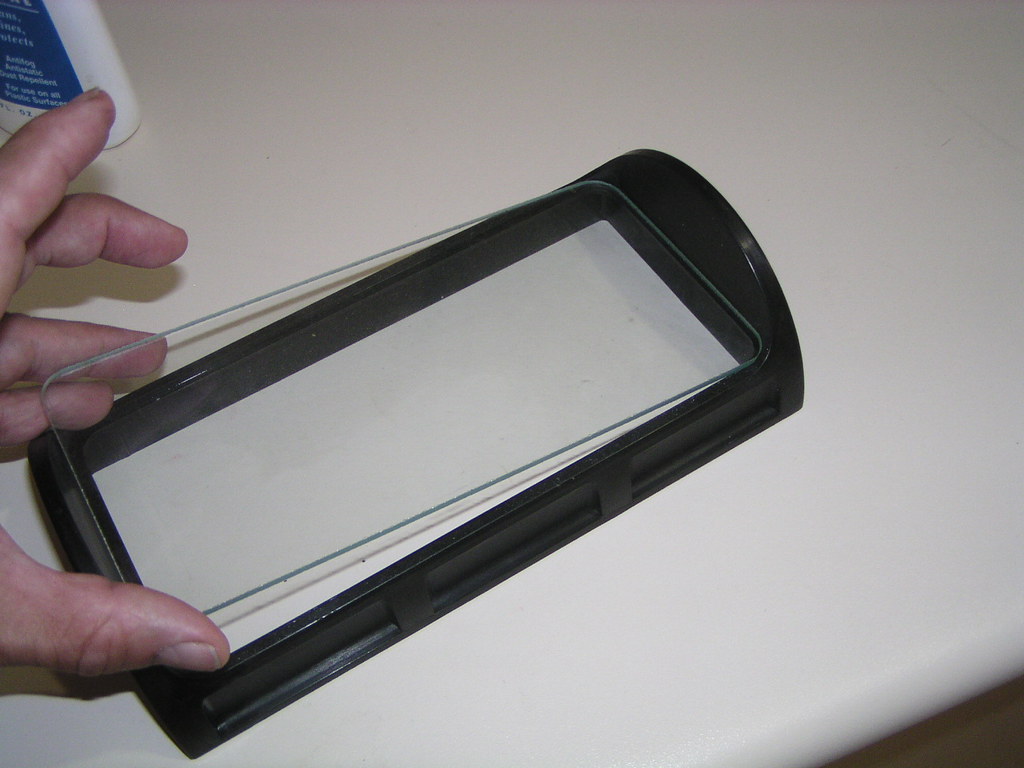
The next issue is waterproofing and I've seen what happens when you get it wrong. I saw a professionally refurbished M instrument 15 yrs ago. The seal around the new glass was not complete and water had got in during rain and washes ruining the gauges and staining the colours of the dials.
I filled a 10 cc syringe with clear silicon and used it to carefully squeeze a fine bead down in the bottom corner of the rebate all the way 'round. The next time, I'll either restrict the end of the syringe to make it an even finer bead or move the syringe faster. Try and make it an unbroken line. Going back to fill in gaps can get messy very quickly.
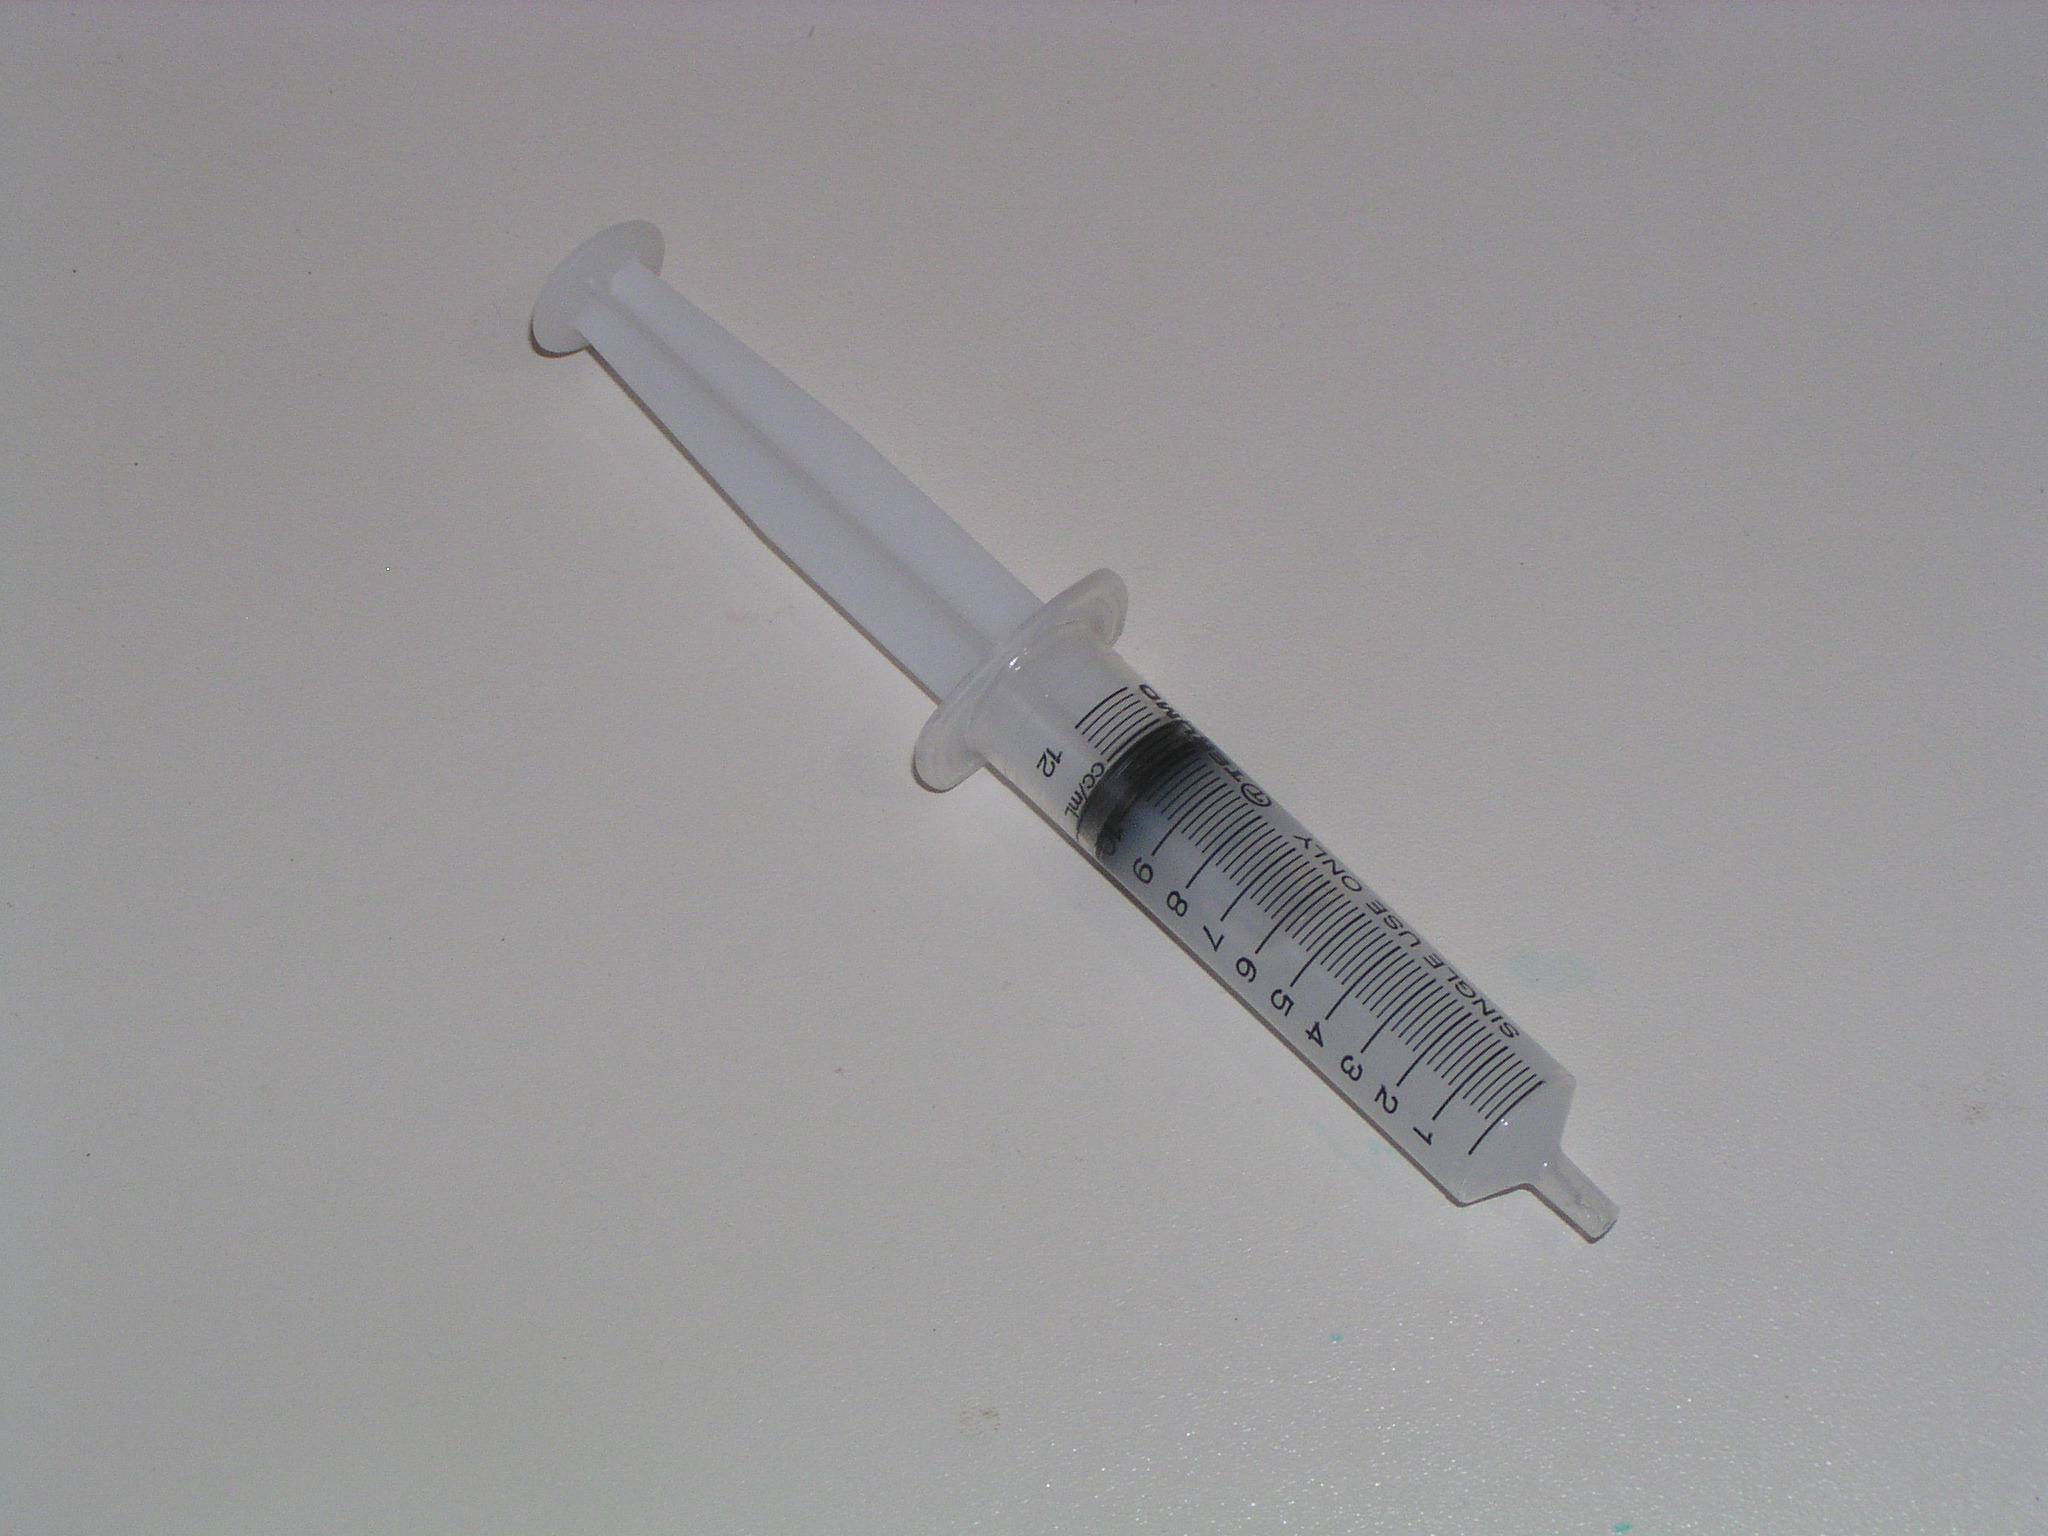
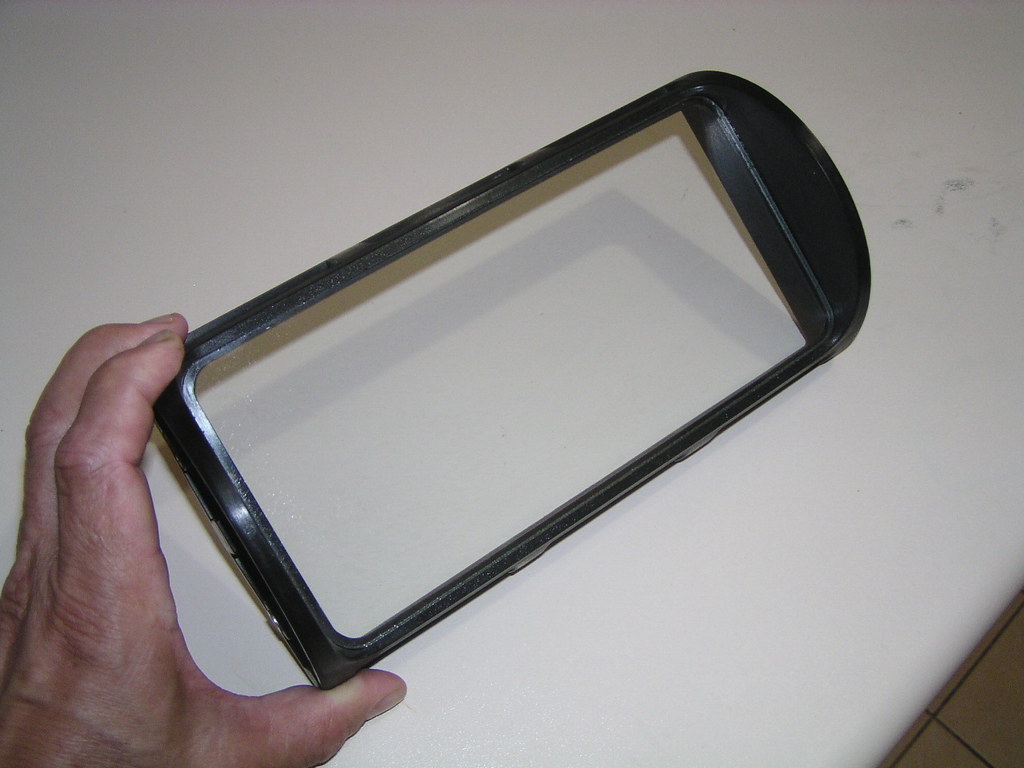
If your bead is fine enough, only a tiny amount is squeezed out and no clean up is required. Cleaning up sticky silicon on glass is very unrewarding and usually unsatisfactory as you won't be able to get into the corners close enough. It becomes a case of diminishing returns. Get it right the first time. If it's getting messy, abort, clean everything thoroughly and start again.
Once the silicon has cured and you're happy with the result, turn the black surround upside down and fill it with water. Check for any leaks. I strongly advise that if there are leaks, you either patch them or start again. Don't use an improperly sealed "glass" out in the weather.
By the way, silicon used in close tolerances like this is immensely strong. It's just as good a glue as a seal. Remember that failed 4 mm glass attempt ? I have not been able to remove the glass despite bearing nearly my whole weight on it during several attempts. Nothing but silicon holding it in.
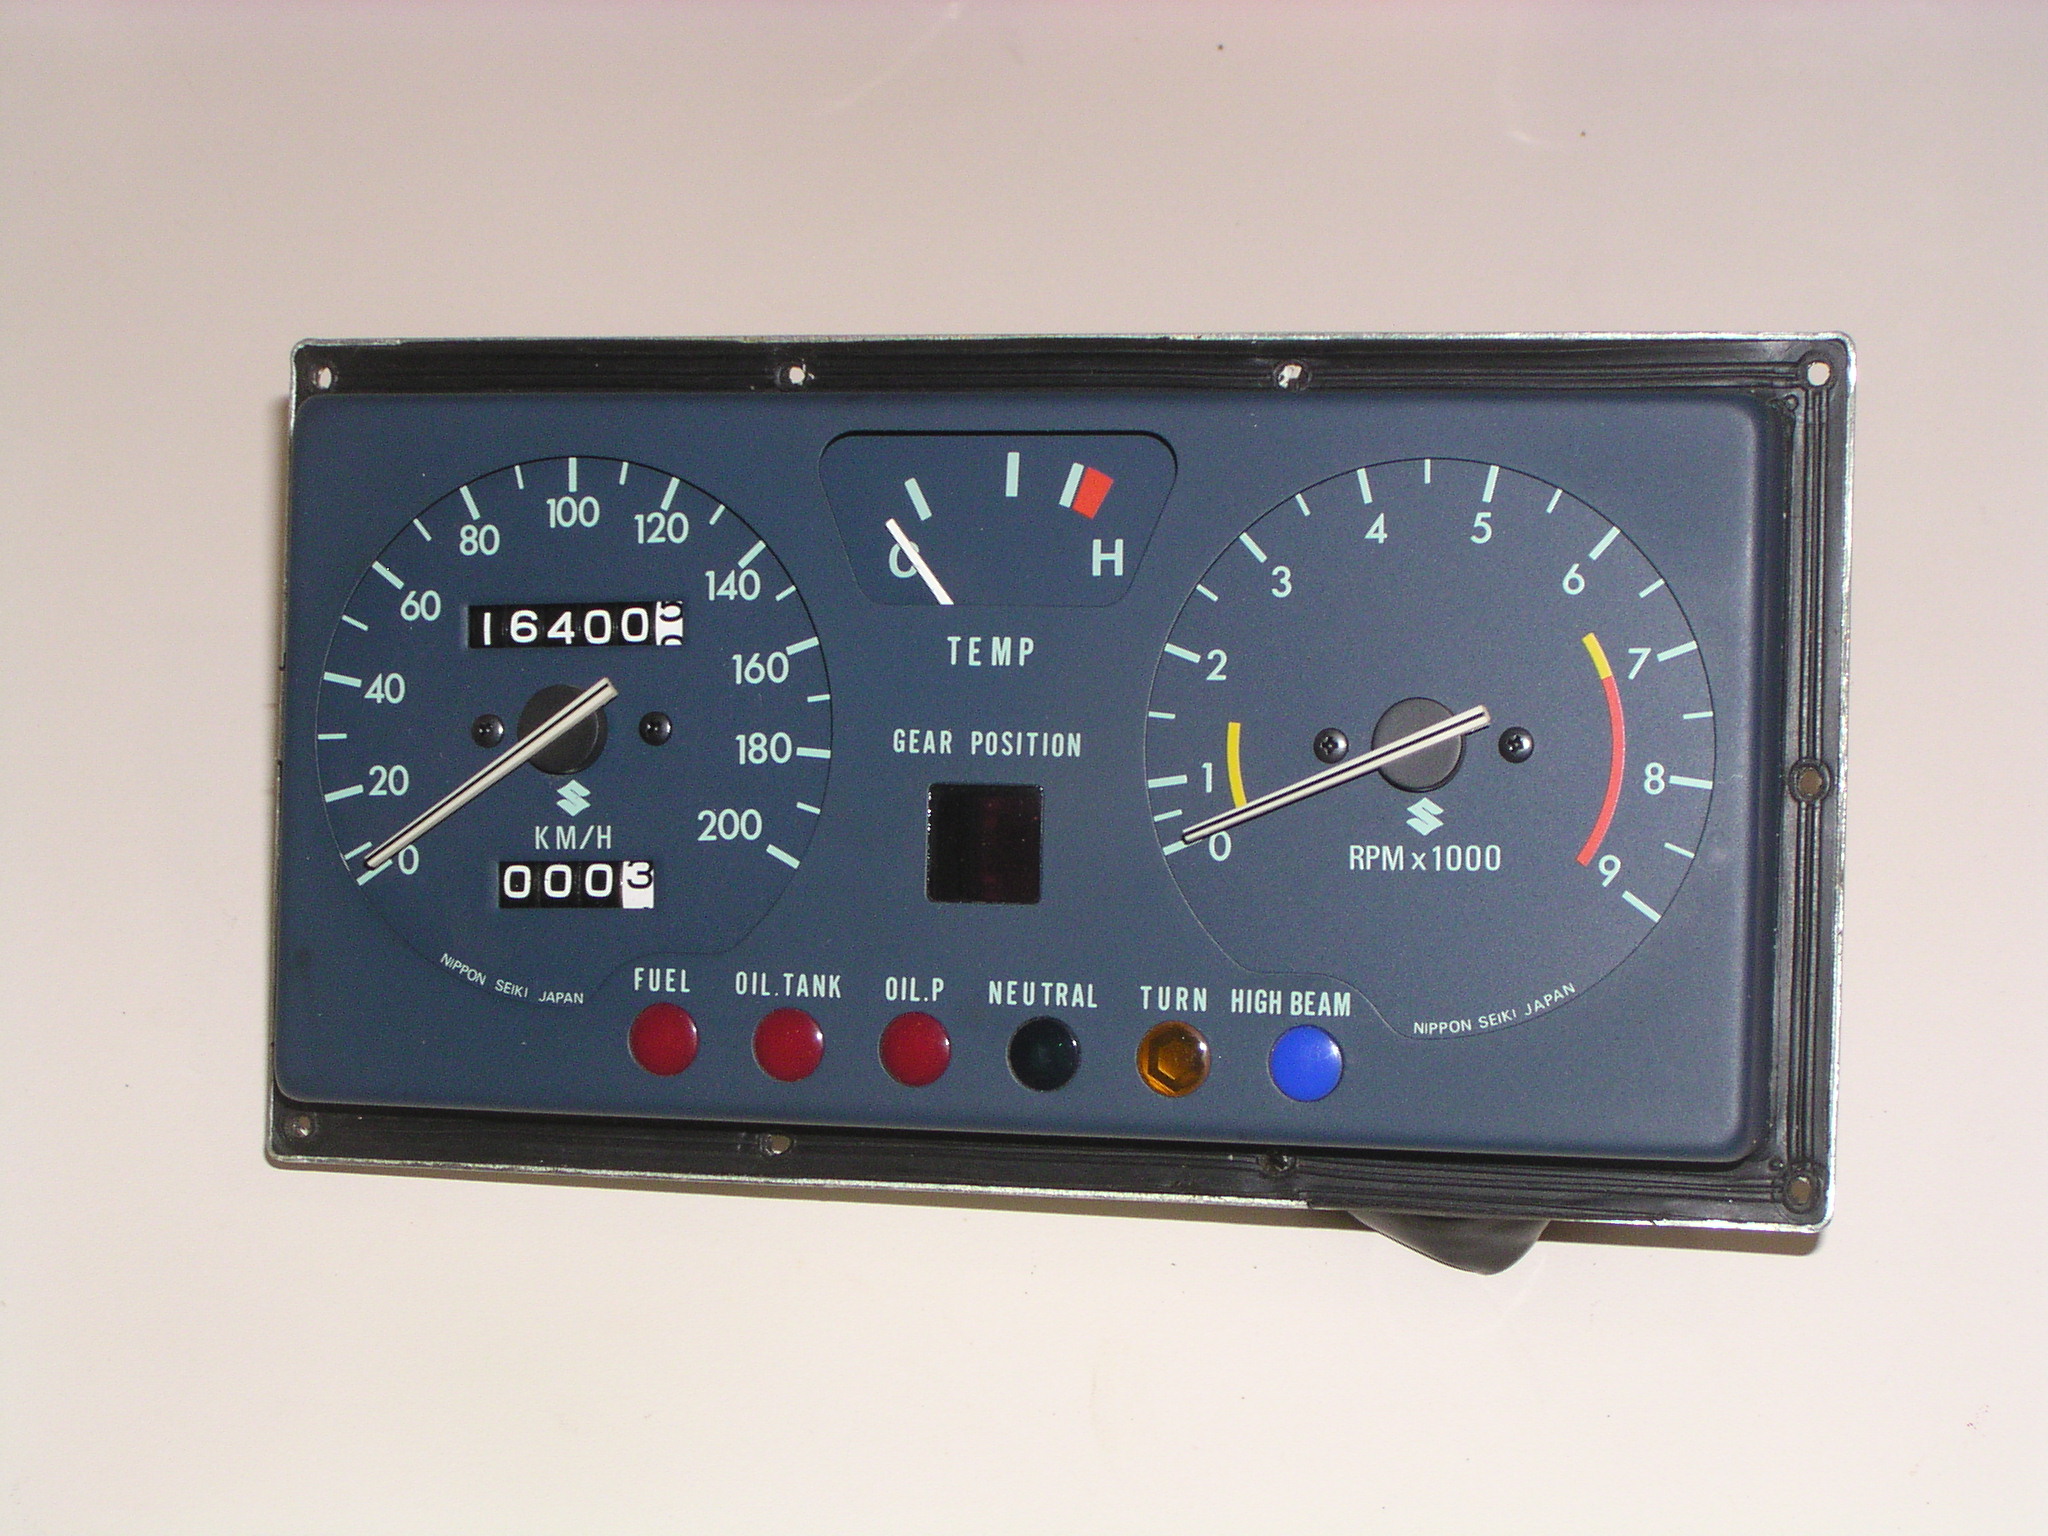
Here's the final sequence of assembly using the cans refurbished in the first part of this thread:

The first section covers the basics of dismantling and refinishing the "cans".
The next section covers two alternate means of replacing the instrument "glass": GOANDY's curved plastic screen followed by information on a flat glass alternative.
Ultimately, this thread will include details on refurbishing or at least servicing the gauges themselves.
DISMANTLING:
Once removed from the bike, turn the can upside down. There are two large screws holding the gauges and top half to the bottom half of the can. Undo these and with a bit of a wiggle, the whole top half of the can and the gauge set can be lifted out of the lower can which retains the flip hood.
Looking at the bottom half with the flip hood, you'll see it's really obvious how it all comes apart.
Meanwhile, re the top half, there are four countersunk screws on the side of the top can which hold the top half to the gauges. Undo those and the top half of the can will separate from the gauges themselves.
You'll also see now that there's 10 small screws that hold the plastic lens to the top half of the gauges if you need to get at them.
Just a warning, I'm told that instruments in general should never be stored upside down as the damping gel for the needles can leak out (probably already dried up and disappeared anyway).


ORIGINAL FINISH:- what was it ?
The cans were not painted. They were brushed satin chrome. Most chrome platers can do this. See below for the plating:
THIS IS NOS (ie a brand new original):

THIS IS AN OLD SET OF CANS REPLATED WITH BRUSHED SATIN CHROME:

THE END CAPS
These are anodized and it was a simple case of supplying them to an anodizer along with an original sample. The job I got back was perfect. Here's a photo of a restored end cap and an NOS cap:


The CLEAR LENS
The original plastic lenses invariably craze. Suzuki had considered using glass but decided against it as design rules in some countries prohibited its use due to safety concerns. The original lens is slightly curved and before you ask, no, nobody has an NOS one. They do not exist, anywhere. The clear lens is unfortunately bonded to the black plastic surround in such a way that it cannot be simply removed. The best results have been achieved by milling out the old clear plastic.
It's possible to replace the lens with flat glass but the depth of the milling rebate has to be carefully judged as the clearance between the instrument needles and the surface of the glass is minimal. It is also essential to ensure that the new bond between glass and surround is waterproof.
It's also possible to make a curved replacement (clearance issues solved !). The following cut and paste from Goandy has had some minor pictures removed. This do not effect the post in any practical way. The original is here: re5rotary.proboards.com/thread/1385/new-curved-instrument-screen
MAKING and FITTING a CURVED CLEAR PLASTIC INSTRUMENT "GLASS" by GOANDY:
Job now finished. I've put a couple of photos on this first post to show what is possible- this is the ideal solution if your screen/lens is crazed or cracked.
Before:

Back on bike:

Here's how I did it.
I want to replace the instrument screens in both my M models as the plastic has crazed and gone yellow. The problem is that is has a compound curve on it, which is what I want to replicate instead of just chucking a bit of flat glass or plexiglass in it.
What I'm doing is taking a mold of both sides of one of my screens and then I'll heat some acrylic sheet and form it between the molds. Yes, I know acrylic will scratch but it will also polish out as well.
I tried making molds out of car filler (epoxy "bog" or "bondo" to the statesiders) but the surface isn't smooth enough- the heated and pressed acrylic shows up any surface blemishes.
Next up I polished the outside of the screen and used a mix of plaster of paris and cement- gives a lovely smooth, shiny surface. I've only done it today so I'll give the molds a few days to cure and then try making a screen.
The inside mold was particularly difficult to extract but nothing a bit of perseverance didn't fix!
**EDIT** Don't use any form of reinforcing in the mold as it will crack around them! Also, for the inside mold (male), whilst it's setting, carefully scrape the plaster away from the sides of the housing- it'll make it much easier to remove when set.
Here's some photos of the progress so far:


Getting pretty close now. A few inclusions on one face for this molding but with better dust control (the acrylic is super static and attracts dust like nothing else!) it should get better. At the end of the day I can also polish any slight imperfections out.
What I do is heat the acrylic sheet in the oven (DON'T TELL THE WIFE!!) for 5-10 mins at 210 celcius, but checking regularly. As soon as it's floppy, I take it out, drop it onto the female mold, line the male mold up on top and clamp them together. a few minutes later it's done. The shape is excellent so once I've got them without any surface imperfections I can start milling out the aperture in the original lens housings, cut these new screen to shape and glue them in! Exciting!
Bit more progress- managed to sneak in a couple of minutes on my friend's mill and then a couple more back at home (supposed to be finishing a few jobs on the house that are 4 years old...)
Milling the old screens out wasn't too bad, but hard to get a nice round corner- close enough though. I couldn't get up to the edge on either end of the screen due to the milling bit not being quite long enough so obviously this screen will lose a few points at the concours! Same for finishing the new screen to fit- all done by eye. I'll fix the screen with epoxy then after it's all set will mask it off and paint the housing in satin black to make it look pretty.
Oh and before anyone asks, no, I won't be doing this for anyone else! It probably takes around 5-6 hours to do one screen spread over a few days plus all the stuffing around trying to get half decent molds made.... I'd suggest you see what Jess has in stock ;D


Screen has a bit of a bow in it but that will be straightened when glued in place...

Little bit of an improvement!

Just to tidy the screen up and hide the glue when I do it, I've put a black border on the inside of the screen. I used a proper paint pen, not a black marker!

Makes a really neat line.

Nearly....

Well here we go. All done and I'm very happy with the result. Not perfect but so much better than before!


All done and back on bike. Looks really good. Unfortunately it makes the rest of it look VERY shabby!


PREPARING and FITTING a FLAT GLASS REPLACEMENT SCREEN:
The first step is to machine out the original plastic. There is practically no other way to do this than by using a mill. I've had three different shops attempt this job and the first was disappointing as it left very visible cutting marks all around the plastic. This was dealt with in the final fitout by gluing a black plastic surround, like a thin picture frame, on top of the glass to hide the poor machining.
GoAndy's solution is more elegant by using a painted black "frame" on the inside of the glass.
My second attempt had the frame milled at one workshop and then I supplied that frame to a run-of-the-mill glass shop who did an impressive job of cutting the glass to a precise fit.
If you're lucky enough to get both a top notch man on the mill and a precise glass cutter, then no garnish frame will be required. My third attempt had the milling and glass supply done by someone on this site who shall remain nameless lest he gets flooded by requests. It's a beautiful milling job he did for me. It's clear from this and Goandy's above that the milling can be done neatly:

That second attempt was with 4 mm glass, the thinnest the shop at the time could cut to size. Despite the precision fit, there simply was not enough clearance between the instrument needles and the inner surface of the glass to allow proper function. I tried raising the black surround holding the glass with thin frames between it and the instruments themselves. By the time you'd packed it high enough, the instruments no longer properly fitted in the cans.
Glass of a maximum 3mm and a rebate in the black surround to match will work. If you can get even thinner glass and less rebate, take that option. With 3mm, make sure the rebate is no deeper, not even a point. You'll lose needle clearance and be back where you started minus a workable surround.


The next issue is waterproofing and I've seen what happens when you get it wrong. I saw a professionally refurbished M instrument 15 yrs ago. The seal around the new glass was not complete and water had got in during rain and washes ruining the gauges and staining the colours of the dials.
I filled a 10 cc syringe with clear silicon and used it to carefully squeeze a fine bead down in the bottom corner of the rebate all the way 'round. The next time, I'll either restrict the end of the syringe to make it an even finer bead or move the syringe faster. Try and make it an unbroken line. Going back to fill in gaps can get messy very quickly.

If your bead is fine enough, only a tiny amount is squeezed out and no clean up is required. Cleaning up sticky silicon on glass is very unrewarding and usually unsatisfactory as you won't be able to get into the corners close enough. It becomes a case of diminishing returns. Get it right the first time. If it's getting messy, abort, clean everything thoroughly and start again.
Once the silicon has cured and you're happy with the result, turn the black surround upside down and fill it with water. Check for any leaks. I strongly advise that if there are leaks, you either patch them or start again. Don't use an improperly sealed "glass" out in the weather.
By the way, silicon used in close tolerances like this is immensely strong. It's just as good a glue as a seal. Remember that failed 4 mm glass attempt ? I have not been able to remove the glass despite bearing nearly my whole weight on it during several attempts. Nothing but silicon holding it in.
Here's the final sequence of assembly using the cans refurbished in the first part of this thread:


