|
|
Post by ziggystardust on Feb 28, 2011 7:08:04 GMT -5
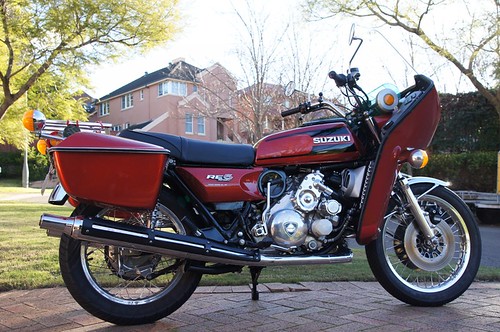
This restored RE5M took 1st place in the Bristol Classic Motorcycle Show 2011. 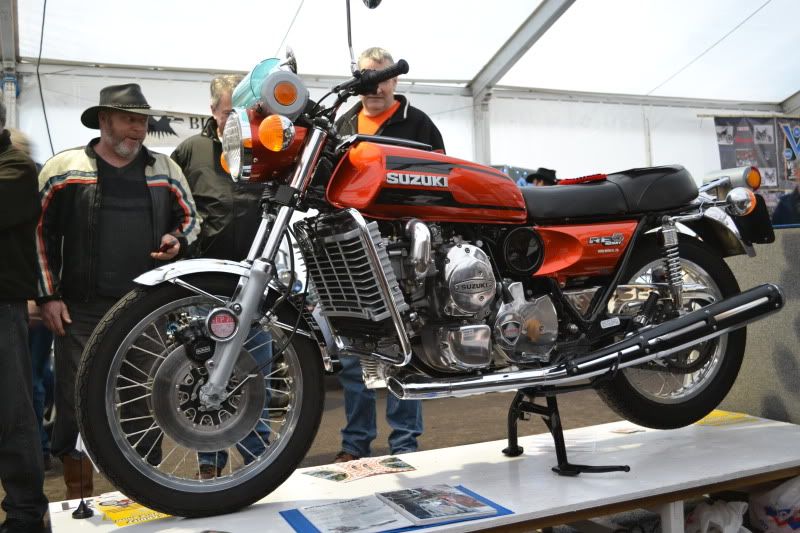  |
|
|
|
Post by SuzukiRE5 on Feb 28, 2011 18:06:26 GMT -5
It's easy to see why. What a gem. It looks like new!!
|
|
|
|
Post by ziggystardust on Mar 7, 2011 12:51:12 GMT -5
This is how it looked before being restored.  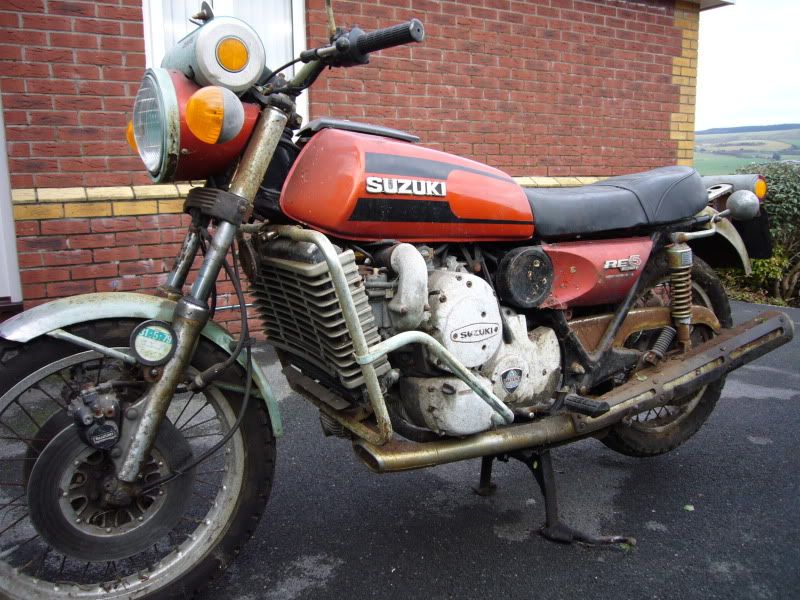 |
|
|
|
Post by SuzukiRE5 on Mar 7, 2011 16:26:24 GMT -5
My exact words that I said out loud when I saw the before picture were....."OMG, Wow!!!"
Amazing work!! Congratulations!!
|
|
|
|
Post by wayne on Mar 17, 2011 6:20:40 GMT -5
Wow ! Is this yours Ziggy ? That is outstanding. How did you revive that alloy ? My current project is half as bad as that and my polisher said that he'd have a go, but doubted we could revive the alloy.
Wayne
|
|
|
|
Post by ziggystardust on Mar 17, 2011 11:17:34 GMT -5
Hi Wayne, Yes it's mine, the forgotten RE5M. www.angelfire.com/retro/roadster/index-9.html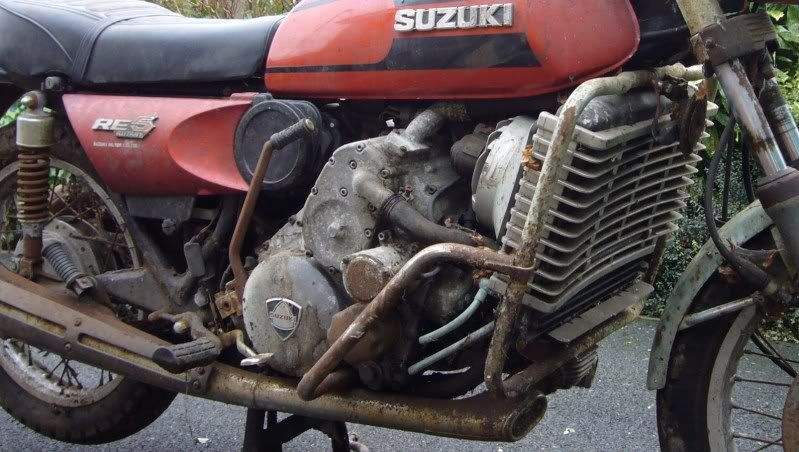 The polished alloy casings can be recovered, hard work though. Aluminium creates it's own protection by oxidizing when left out in the elements, it's a tough unsightly scale that prevents further oxidizing but under this scale it scars the aluminium badly. To remove it you have to be ruthless with a hand held disk grinder, I used one fitted with a coarse abrasive flap wheel. Wear protective goggles and a face mask so you don't inhale the aluminum particles. As I said you have to be ruthless and get under the oxidization to the clean aluminium, try to keep the contours the same. I used three different grinders in all, the round disk type, a triangular shaped one and a rectangular one to get into the curves and such. Once your happy that the scars have been removed do it all again with a finer abrasive, then again with an even finer one. Now work the casings by hand with sheets of wet and dry and water to remove the scratches, takes time and again come down to finer abrasives to get the good finish. Only after this can you polish the casings on a buffing wheel to achieve the desired effect. Z |
|
|
|
Post by steveuk on Mar 17, 2011 12:15:20 GMT -5
i start with paint stripper which removes any old laquer and most of the oxidization then i use different grades of wet and dry followed by different grades of wire wool and a polishing compound and then i put them on the polishing wheel.
|
|
|
|
Post by ziggystardust on Mar 17, 2011 12:48:35 GMT -5
Yes it all depends on the severity of the oxidizing, mine seemed to be the worst example, the worst I'd ever seen. There are still scars in some unpolished inner castings that I can't remove but they look original as in sand castings, I had these vapor cleaned. To clean the exhaust manifold I had to have it fine grit blasted. I did a very similar approach to you Steve with my A model but on the M I never even saw any lacquer, that had lifted and disappeared years ago, under the oxidization the black scars were deep as could be expected after standing sweating under a tarpaulin sheet in a back garden for over thirty years.  |
|
|
|
Post by wayne on Mar 23, 2011 18:11:00 GMT -5
Well that explains why the professionals don't want to do it. Far too much work, only for an enthusiast.
My next question is how is the alloy holding up longer term ? I've found some of it can "regress" after the initial polish with light coverings of corrosion, sometimes even overnight. But another once over seems to hold it (but this is alloy in far better condition than above).
Your pipes, through the rust, don't seem too bad as evidenced by the condition of your heat shields. They look reasonably smooth and straight. Most that I see are pretty badly bent and scraped. I put all my ferrous in a molasses bath which seems to work well. I've seen too many examples of rust bubbling up through rechromed headlight shells etc.
Thanks,
Wayne
|
|
|
|
Post by ziggystardust on Mar 24, 2011 4:42:22 GMT -5
Yes for an RE5 in the condition as mine was it was hard work but don't think I resurrected all the parts from the bike, many items had gone way too far with corrosion and were scrapped.
The exhausts, fenders, wheel rims, rear shocks, chain guard and most other chrome parts were scrapped. I saved what I could and re chromed and painted some bits but most had to be replaced.
I don't have a problem with the aluminium oxidizing too much, if I see it looking a little dull then I give it a polish with Autosol polishing paste and it looks good for weeks.
|
|
|
|
Post by wayne on Mar 24, 2011 5:52:37 GMT -5
Well, that's a stunning looking job. All the more so because of the work you personally put in. Most impressive.
I've passed these photos on to a friend who has a couple of bucket cases and was thinking of scrapping the whole lot. Neither are as bad as what you started with and both run. Hopefully this will inspire him.
Wayne
|
|
|
|
Post by aerologic on Dec 22, 2011 17:15:44 GMT -5
What is that extra brace on the crash bar? I have not seen that before. I assume it was not original since it is not in the restored version.
|
|
|
|
Post by ziggystardust on Dec 23, 2011 16:54:07 GMT -5
Yes they are original crash bars from Suzuki for the RE5, I didnt use them as they would have added extra cost to the restoration to have them re chromed.
They are rare, I sent them to Denmark, RE5DK has them.
Z
|
|
|
|
Post by mike500 on Jan 3, 2012 15:29:01 GMT -5
other way to clean alloy forks cases etc is to shot peen them then polish with differnt grades of mops and paste etc on a bench grinder here are my z1 forks im starting to polish at moment
|
|
|
|
Post by hitch001 on Dec 8, 2012 17:21:26 GMT -5
OMG!!! That you got that cruddy looking thing to an outstanding restoration is almost beyond belief. A mighty fine job of restoration.
|
|