|
|
Post by gokart on Oct 1, 2010 7:10:33 GMT -5
Just to add about the correct port timing : there is two possible adjustments to set this timing.
One is with the cable and you only have to verify the opening at 35° from close throttle.
The second is the basic setup of the port command at his own close position. There is one screw to setup the correct close position. Depending of this screw setup (more or less turned in), the port valve will open sooner or later even if the cable command is set to 35°.
I didn't read anything about this subject inside the Suzuki technical documentation.
Does anyone know ?
(Hope my "technical english" makes sense...)
Alain
|
|
|
|
Post by gokart on Oct 7, 2010 4:17:11 GMT -5
Really nobody who knows something about this port valve basic setup ??
Alain
|
|
|
|
Post by wayne on Oct 7, 2010 20:04:12 GMT -5
You need to have a look at Suzuki Service bulletin #9. It gives a very detailed step by step to setting all the carby cables and the port valve. I can send it to anyone who wants it but it will take a day or two as I am away and have limited access to email. It does exist on the web as well, a search should find it.
An important point though. Before starting any aligning etc with the carb tool, you must establish the 0 degree point. Back off all the cables and with the air horn off, make sure that the primary butterfly is actually fully closed- that is the "zero" degree point. To do this, make sure that the twist grip stop screw is also completely backed off. It is underneath the throttle grip block on the handlebars and is easily missed.
I also had to physically push the primary butterfly closed with a soft stick to get the zero point to align my carby tool.
Wayne
|
|
|
|
Post by wayne on Oct 7, 2010 20:09:09 GMT -5
Just one more point as I've mentioned on another board and Ziggy touched on this. I believe that you really should do the carby, cable and port valve setup properly in the first instance along with checking ignition timing. When you've really done all of this, then play with the main jetting.
Suzuki Service bulletin 9 has all the latest specs.
Wayne
|
|
|
|
Post by gokart on Oct 8, 2010 2:28:28 GMT -5
Hi Wayne. Many thanks for your reply but I have the bulletin 9. My question was not about the cable setup. I did it "perfectly".
I just asked how to setup the right closed position for the port valve. When you remove the port valve cover, you can see a screw and a nut permitting to setup this closed position.
I did a lot of road tests and i noticed this setup had a great influence on the flatspot hesitation. Sooner opening was better but not enough to completely eliminate the hesitation. Only overjetting (-->100) was the efficient solution...
Alain
|
|
|
|
Post by gokart on Oct 8, 2010 2:35:46 GMT -5
Finally i have found the technical information about the right opening port valve setup.
It is at pages 27 - 28 of the "Rotary Engine Manual". I quote :
"Position the port valve adjusting screw in place so as to introduce a clearance of 0.1 to 0.15 mm (0.004 ~ 0.006 in.) between port valve and intake port of the rotor housing..."
Hope this can help.
Alain
|
|
|
|
Post by wayne on Oct 9, 2010 16:07:56 GMT -5
Okay, I see what you mean. Thanks for the reference to the port valve stop screw setting.
Wayne
|
|
|
|
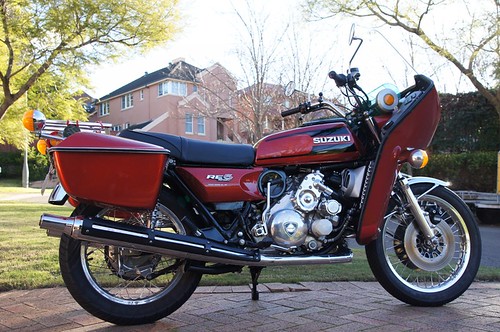
Post by Aussie RE Man on Nov 3, 2010 17:22:59 GMT -5
|
|
|
|
Post by pmcburney on Nov 5, 2010 22:45:12 GMT -5
Thanks for the kind comments Simon, I'm very glad it's made a difference to your bike.
Although, in fairness to the other RE5-experimenters out there, I don't think I deserve all the credit for the great results that folk have been having.
After all, I 'stole' the idea from a poster on this forum... all I then did was fiddle around a bit myself.
I'm really happy it's made such a difference to everyone's bikes.
I'm firmly of the belief you should never be afraid to question the Manufacturer's thinking when it comes to obvious shortcomings!
Further to the experimenting thing, I'll soon be getting an adapter-plate made to fit a 40mm CV carb to my RE.
I have a carb sitting around at home from a DR650 (having replaced that carb with a 39mm Keihin FCR - a popular mod).
I figure it's about the same size as the SU's that folk have trialled over the years, so it shouldn't be too hard to get working.
If it negates the OEM carb issues, I'll be bloody ecstatic and will likely keep it on the bike for everyday riding.
However, I'll be putting the conversion together to be as simple, cheap and completely 'non-invasive' and reversible as I can - I want to be able to go back to original without any changes to any OEM parts.
I'll take some pics and publish the process (and cost!) in a new thread shortly.
Cheers
Paul McB
|
|
|
|
Post by wayne on Dec 15, 2010 5:46:57 GMT -5
Okay, I was finally ready to try the bigger jets in my RE5 M carby. Now I have been on this board to say that my bike runs completely hesitation/flat spot free but that I've always found it to be so sensitive that even changing to an A/M air filter will bring back the hesitation. But I made the point that the bike can be made to run okay with the standard jetting (and I sort of assumed that I had the 87.5 as it was a bulletin and mine's a late model M).
Lo and behold, I had a look at my primary jet today in preparation for experimentation and guess what, as standard, I've had a 90 the whole time (the original spec for the RE5 primay main).
I guess that the first thing to do is to put in an 87.5 from my other carb and see if the current very clean state of tune is changed. I'll report back.
Wayne
|
|
|
|
Post by ziggystardust on Dec 15, 2010 13:53:00 GMT -5
That's what I did earlier Wayne, both my RE5s ran with the very slightest 'flat spot' that I just couldn't tune out, changed the main jets from 87.5 to 90 and both are 'flat spot free' now.  |
|
|
|
Post by wayne on Dec 16, 2010 1:03:47 GMT -5
Firstly let me say- you've gotta try this. It is SO EASY to do roadside. Five minutes from hopping of the bike and your ready to roll with a different jet.
Went out today with a bag of jets, flat blade screwdriver and Satay stick (thanks Lee, works a charm).
Did 100 klm on the original 90 jet which was in the bike.
Changed to a 87.5 and rode it 50 klm on a route where you spend the whole time between 2,500 and 4,000 rpm in 4th and 5th- hesitation city. Changing down to the 87.5 made almost no difference. No hesitation whatsoever. So I'll back what I was saying earlier, it is possible to get them right with the Suzuki specs- but please don't take this the wrong way, I'm not saying I'm some guru tuner and others aren't, I bumbled and stumbled my way here. The only difference, maybe, possibly, was slightly less mumbo below 3,000 rpm.
I then changed to a 92.5 and rode the same road. I can't really put my finger on it, but for me, the 92.5 is the jet. It just felt smoother, more sorted, I just can't say exactly, it just felt nicer.
Next up, trying Jess' plug adaptor and R1 plug and then some AM air filters which have never worked for me with my standard jetting.
Wayne
|
|
|
|
Post by spottydog4477 on Nov 10, 2011 4:24:44 GMT -5
I bought a 92.5, 95, 100 jets from show and go. I tried the 95 first and .......sweet!
Smoothe over the whole rev band
I'll give the 100 a go - just to see
|
|
t140v
3rd Gear

Posts: 422
|
Post by t140v on Nov 10, 2011 15:22:42 GMT -5
Thanks to all who have taken the time and patience to eliminate the so called "flat spot" its going to make life so much easier when I rebuild and recomission my bike.
And thanks to whoever brought the original post from the depths of the forum I had not come accross it even though I've been reading for weeks.
Regards Stuart.
|
|
|
|
Post by spottydog4477 on Nov 20, 2011 1:16:04 GMT -5
tried the 92.5............bike ran poorer than with the 95.......................tried the 100....its was better than the 95!.
I'll stick with the 100
part number N102/221 bought them from Show n go motorcycles (08) 8376 0333
|
|


 Amazing ;D I have 3 RE’s, 2 A models and one M. One of the A models was a pig and embarrassing to ride with its terrible flat spot. I could never get it tunned right out, even after hours of twiddling and carby cleaning, but I was very reluctant to try different jets as manufactures know best
  I finally gave in after reading this and ordered 4 different jets from Showandgo 11.00am one morning, and had them the next morning in my hot little hands. I replace the standard jet with a 95 in about 2 min’s, with one flat-headed screwdriver and a cocktail stick and went for a blast, and it’s like a different bike!!! 100% better!! Not sure about the fuel aeration line, I’m more inclined to think that as the engines ages and they have varying/less compression and suck and more fuming/engine breathing the mixture weakens and needs to be a bit richer. Anyway its brilliant now thanks to Paul McBurney's testing and reporting, Cheers Paul.


